


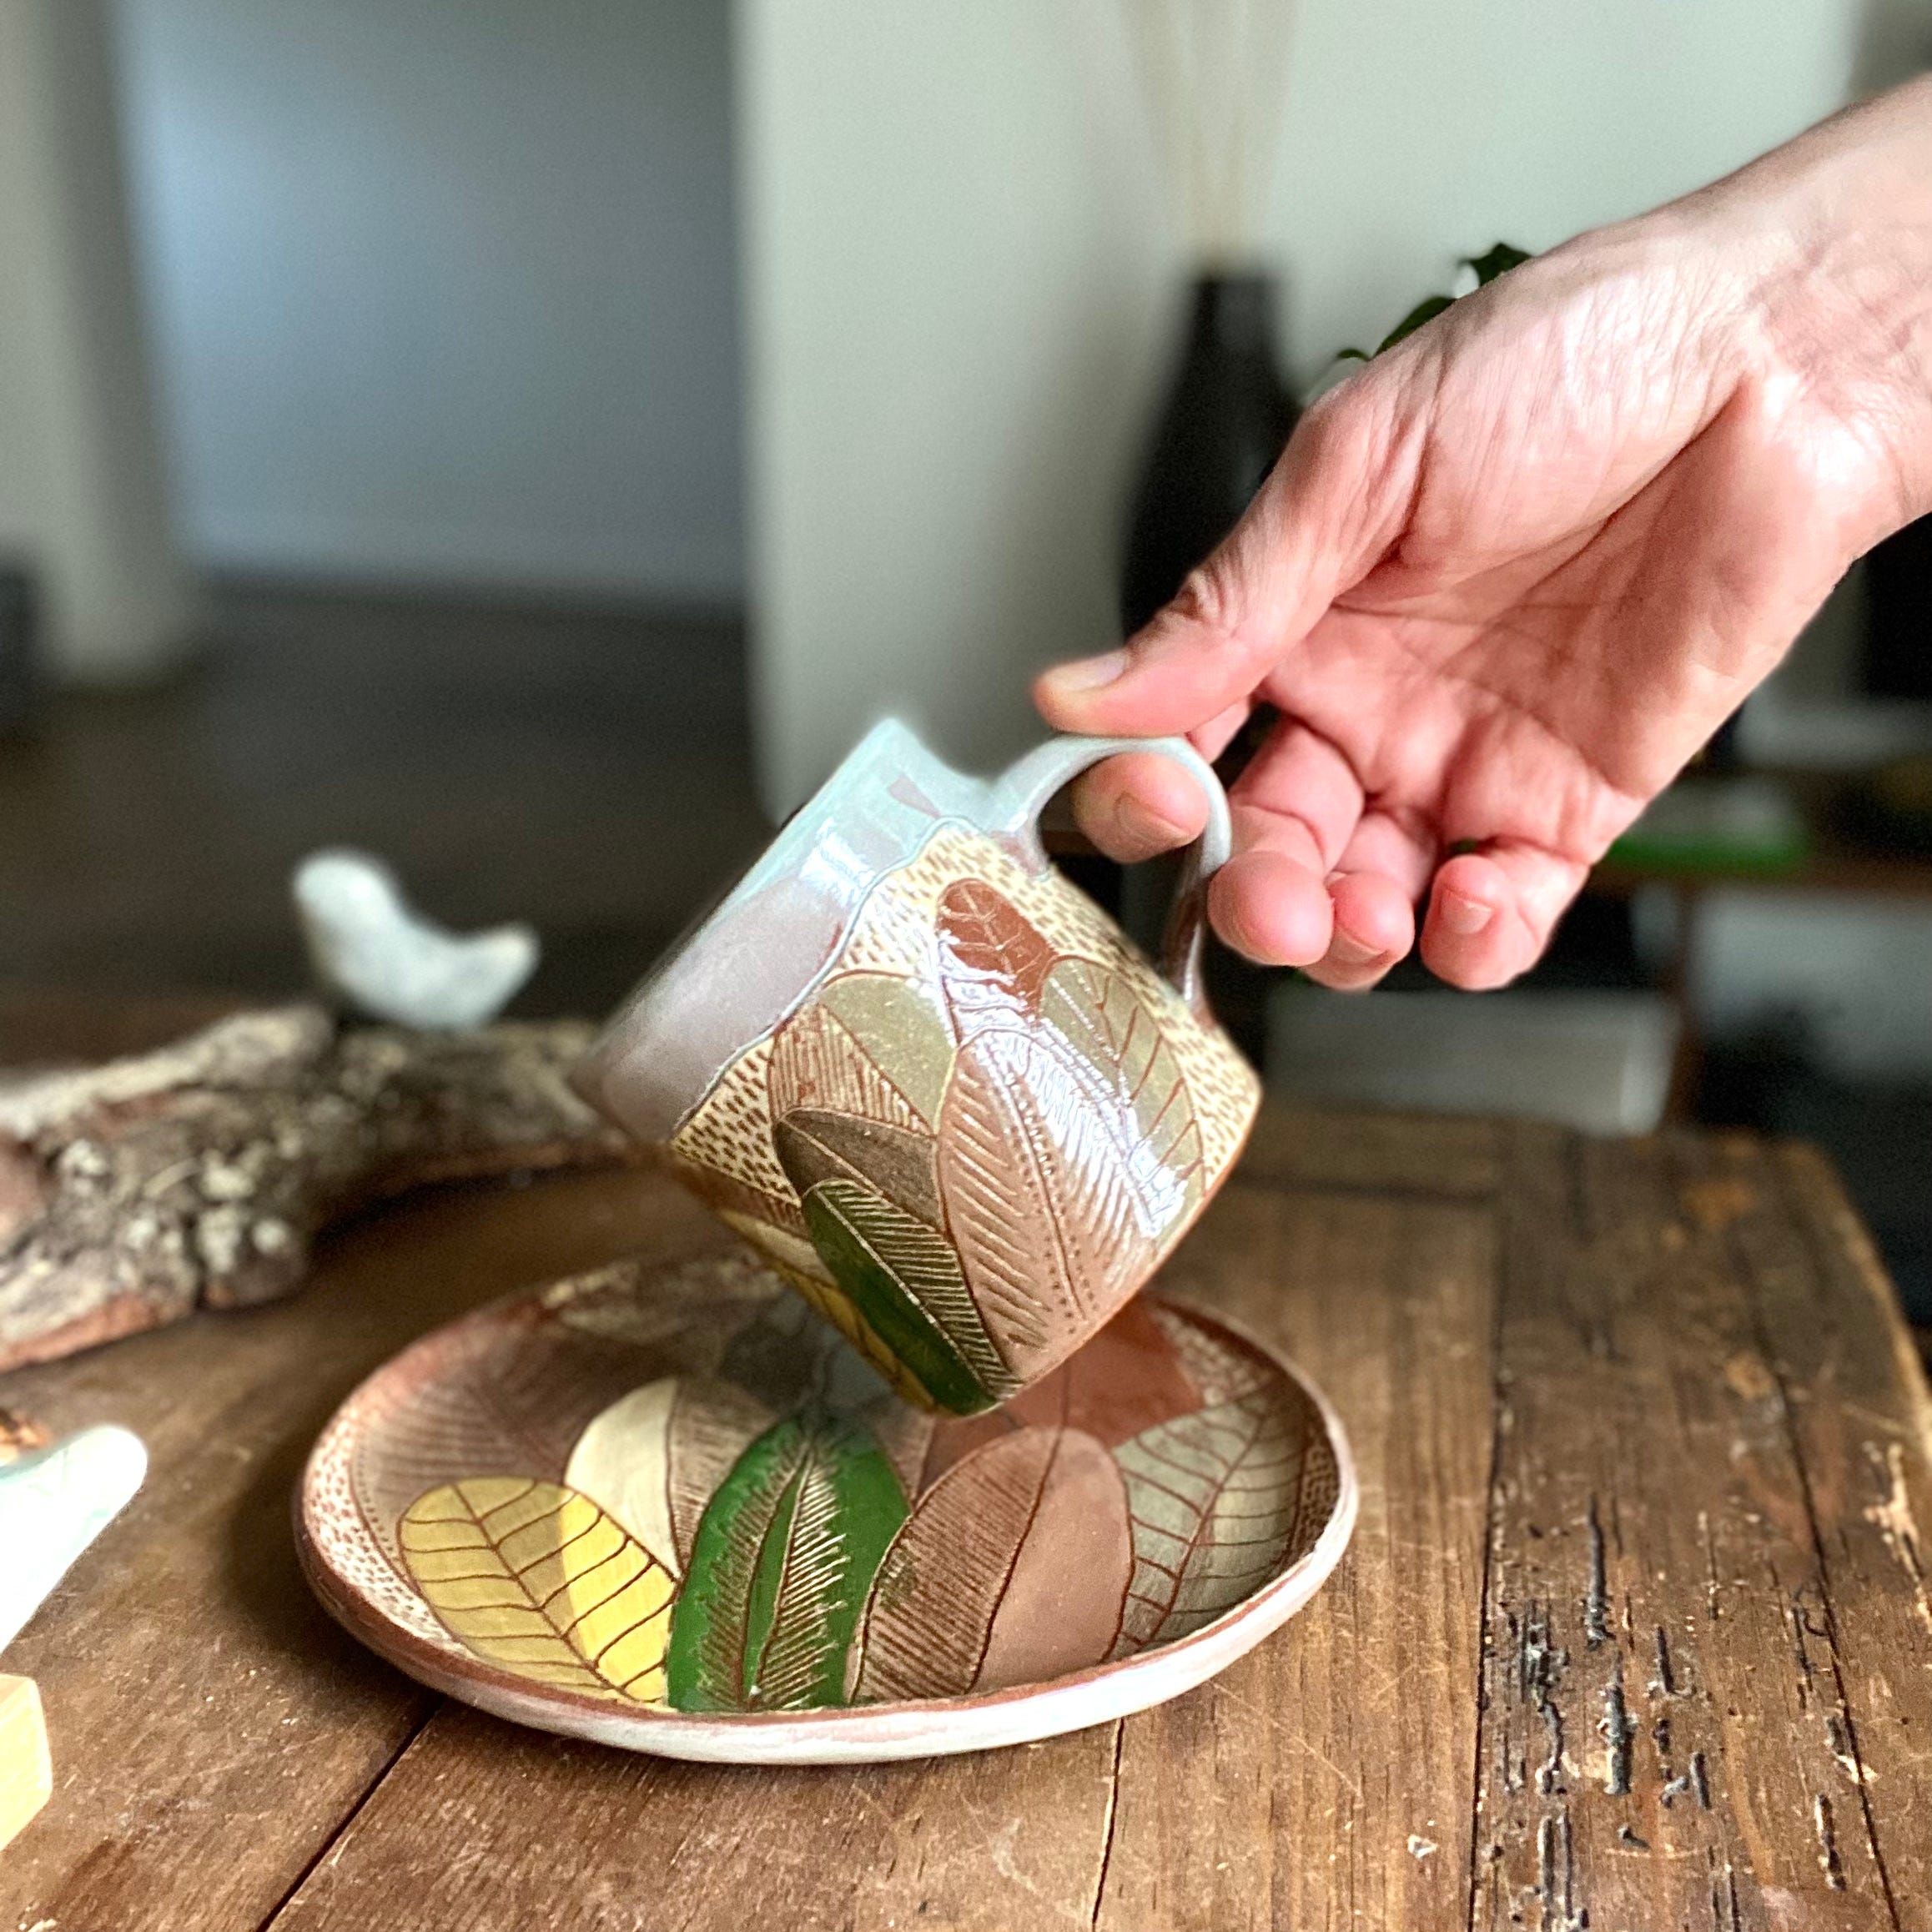
What's in a mug?
Quite a lot, even before you fill it with your favourite beverage.

The other day I had someone in the studio for a “Make and decorate a mug” workshop. It’s a fun workshop where I show how I make my mugs from a slab and a paper template. I usually go over the basics of handbuilding while I roll the slab, the participants imitate what I do and follow along.
Mostly, people want to get the making part done quickly and move to the decorating part. Everyone loves to get to the underglazes and get “painting”. Not this participant.
Kasia — that is her real name, and she’s a friend so she won’t mind if I “embellish” our conversation — wanted to know all the whys as well as the hows. As I started to explain things to her, I realised that it had been a while since I had thought about the process myself and that a lot of the things I did, I did on auto-pilot. Sometime ago, I figured out what worked best for the kind of mug I wanted to make, and now I just make them, without thinking about it. Occasionally, there are small adjustments, like when, about six months ago, I started adding a very thin coil to the inside of the mug to better join the walls and the bottom, or when, about three months ago, a started to stretch the bottom of the mugs to make them taper slightly toward the top.
In any case, these adjustments and all the evolutions my mugs went through over the years, they all happen in my head and I’ve never had to explain or justify them to anyone. In previous workshops people took my word for it, they went along; like I said, they mostly enjoy the decorating part. And now here was someone asking all these questions and making me think in order to find the words to articulate what I knew only instinctively. So, when it came to decide what to write about this week, I thought it could be interesting to try to recreate our conversation during the workshop and see if I could put the whole thing into written words.
Let’s start by rolling a slab to a 5 mm thickness.
Why?
Because 4 is too thin and 6 is too thick for a mug.
Really? 1 mm makes that much difference that you can tell?
Yes, actually it does.
So much so that, having forever rolled slabs 5 mm thick for all my pieces without thinking about it, the next day I rolled a slab 4 mm thick — because now I can, thanks to the new spacers with different thicknesses Radek gave me for Christmas (some girls want diamonds, me, give me wooden sticks and I am happy as can be) — and made some espresso beakers. I was mind blown by the difference, how much better the beakers looked. How much lighter they felt, how much more comfortable it was to hold them, and how much more “ergonomic” the lip looked. 1 mm. Wow.So, once we roll the slab to the desired thickness, we run a metal rib along it and across it, this way and that. To smooth the surface.
Why?
Err… Something... Clay particles… Compress… Something…
I knew why. I just wasn’t prepared for the question. Once I had learned why, I just did it and I never had to explain it before.Right, wait. So… When you roll a slab, you push it… Actually, let me back up.
Why? I’m doing it…
Before getting to the rib… How you roll the slab is important. Let’s starts there. It’s important to roll it in different directions, not always the same. When you finish rolling one way, pause, lift the slab and rotate it a quarter way. Then, roll again, pause, rotate again. Keep doing this. This not only prevents the slab from sticking to the board, it helps stretch the clay evenly and prevents it from later drying unevenly and shrinking in one direction only. You see, clay has a memory…
What?!
I know, it sounds weird. It’s true though. Clay remembers. So, when you reach the 5 mm, get the rib — a softish rib is better, I prefer the flexible metal one for this job — and smooth the surface this way and that, compressing the clay and helping it remember that it now is a slab. Then carefully lift the slab, turn it and do the same on the other side. Smooth and compress. Smooth and compress. It helps to repeat “You are now a slab, you are now a slab”… Just kidding, I don’t do this.
Funny. What next?
Next, we grab the template and trace it with a needle tool or a sharp pencil. You don’t want to cut the clay yet just to mark it.
Why is it a rectangle when it’s supposed to be a mug?
Well, I make my mugs with straight sides. If you want yours to have slanted sides, or to have a narrower rounded lower part or to be more like a cup of tea… then you need to draw and cut a different template. You can still alter the shape of a mug made with a simple long rectangle, but not a lot, only slightly, like giving it a bit of a belly or making it slightly wider at the bottom, or at the top… Actually, you can still cut some darts out, triangles, and then, to round up the shape…
I feel like I can end every sentence with “the possibilities are endless, actually, your imagination is the limit” but I didn’t want to overwhelm her.OK, no, I’ll use this one.
This template is made from thick paper, like the back of a notepad, or a cereal box. You can use more durable materials, like tarpaper, or thicker cardboard, but for me this works well. The important thing is that it shouldn’t be shinny or plastic because it would stick to the clay. So, once we trace it onto the slab we can cut out the rectangle. I have pottery knives but, again, you can use any knife for this, but it’s better if it’s thin…
Huh… You make it look easy…
It helps if you rotate the board to position the slab so that you always cut towards you, you have better control that way. You can also put one of the spacers along the mark, like a ruler, and cut. The leftovers we put to the side, wrapped in plastic — they will be useful to make the handle and the bottom. Now, before picking it up and shaping it to join the sides, we run a finger along one of the longer sides, like so.
Just one? Why not on both? Or all of them?
Because we do this on the side that will become the lip of the mug. You know… the part of the mug your lips touch when you drink. It’s nicer on the lips if it’s rounded and it’s easier to drink from if it’s slightly slanted to the inside.
Wow, you thought of everything.
I wouldn’t say that. I am sure there are things I have not considered. My mugs have evolved, changed a lot in the last couple of years… But there’s always room for improvement, or simply to do things a different way. I make mugs the way I like mugs to be, and so they look a certain way and feel the way I like a mug to feel when I use it, drink from it. Others may have different preferences. Wait till we get to the handle…
Then the possibilities really are endless…What’s next?
Next, we want to join the shorter sides and start telling the slab that, now, it needs to be round… To make a good joint, we bezel the sides… cut them all the way along, at a 45º angle, more or less. They need to meet and complement each other, so you need to cut once with the knife pointing towards the clay and on the other end with the knife pointing to the outside… Or you can cut once, flip the slab left to right and cut again… Sounds complicated but it’s not. Let me show you.
Ahh! I get it now. Of course, makes sense.
Great. Now, let’s lift the slab and make it round, bring the short sides together. Ideally, we should let the slab stiffen up a bit, let some of the moisture leave the clay. It would make our job easier, but it’s ok. We just need to be a bit more careful. Usually, when I am making these, I have more than one going and, at this point, I lift the first slap and round it into a narrower cylinder than I want the final shape to be and then move to the next slab. This way, the slab begins to forget it was flat and accept its new rounded fate. Then, when I join the sides, it’s actually to a wider round than before, so the clay doesn’t fight it so much…
I can tell I lost her a bit… Her curiosity got me all talkative and I am getting carried away, explaining too much. Too much info, as they say. Back to the task at hand…Anyway… Let’s join the sides. The clay is actually moist enough that we could simply press the seams together and they would blend nicely. But let’s score anyway.
Score?
Right. Scratch, I guess. For this you can use the other metal rib, the one with small teeth, or you can use a scoring tool made for this purpose alone or you can use an old tooth brush, it doesn’t matter. Basically, you need to create indentations in the clay, on both sides, so they blend better. If the clay was drier, we would add a little water, to make some mud as I tell the kids. The mud (slip, if you are a potter) is the glue… Like that, yes. Now, supporting the wall from the inside, compress the joint either with your finger or you can use a rib. And you can either smooth the seam, completely blending it in and making it invisible or, when the two side are properly joined, you can highlight the seam. Totally up to you.
There is more to a mug than I ever thought possible.. I never paid attention.
She is quiet, focusing on joining the seam. Usually, I play some music in the background but today the studio is quiet and when we are not talking there is total silence. I start to worry that she is getting tired of my explanations and that the silence is bothering her. Kasia has told me before that clay is not her favourite medium (she is a linocut artist and a painter), in fact she doesn’t like the way it feels on her hands…
Then…
This is nice. So quiet. I needed this. My mind… It’s been so loud lately. And somehow, the clay feels nice, I am changing my mind about it…
I know she is not just talking about the surrounding silence. Clay has this effect on me too. I think I am blushing. I smile.I need coffee. Can I get you something? We should leave the cylinders alone for a moment. The clay needs to stiffen and dry a little before we can handle it to attach the bottom. We can take a break.
So… how long does it take you to make one of these?
Well… to borrow some wise potter’s words, I can’t remember who: to make a mug like this took me about 13 years.
I smile. She smiles. She gets it.So, you ask, what’s in a mug? Learning, planning, a lot of work, trial and mostly error, a lot of error, repetition, sweat and some tears. And love to keep it all going. Above all, there is the hope that, on the other end, there will be someone holding it in both hands, with a smile on their face, and that they, too, will get it.
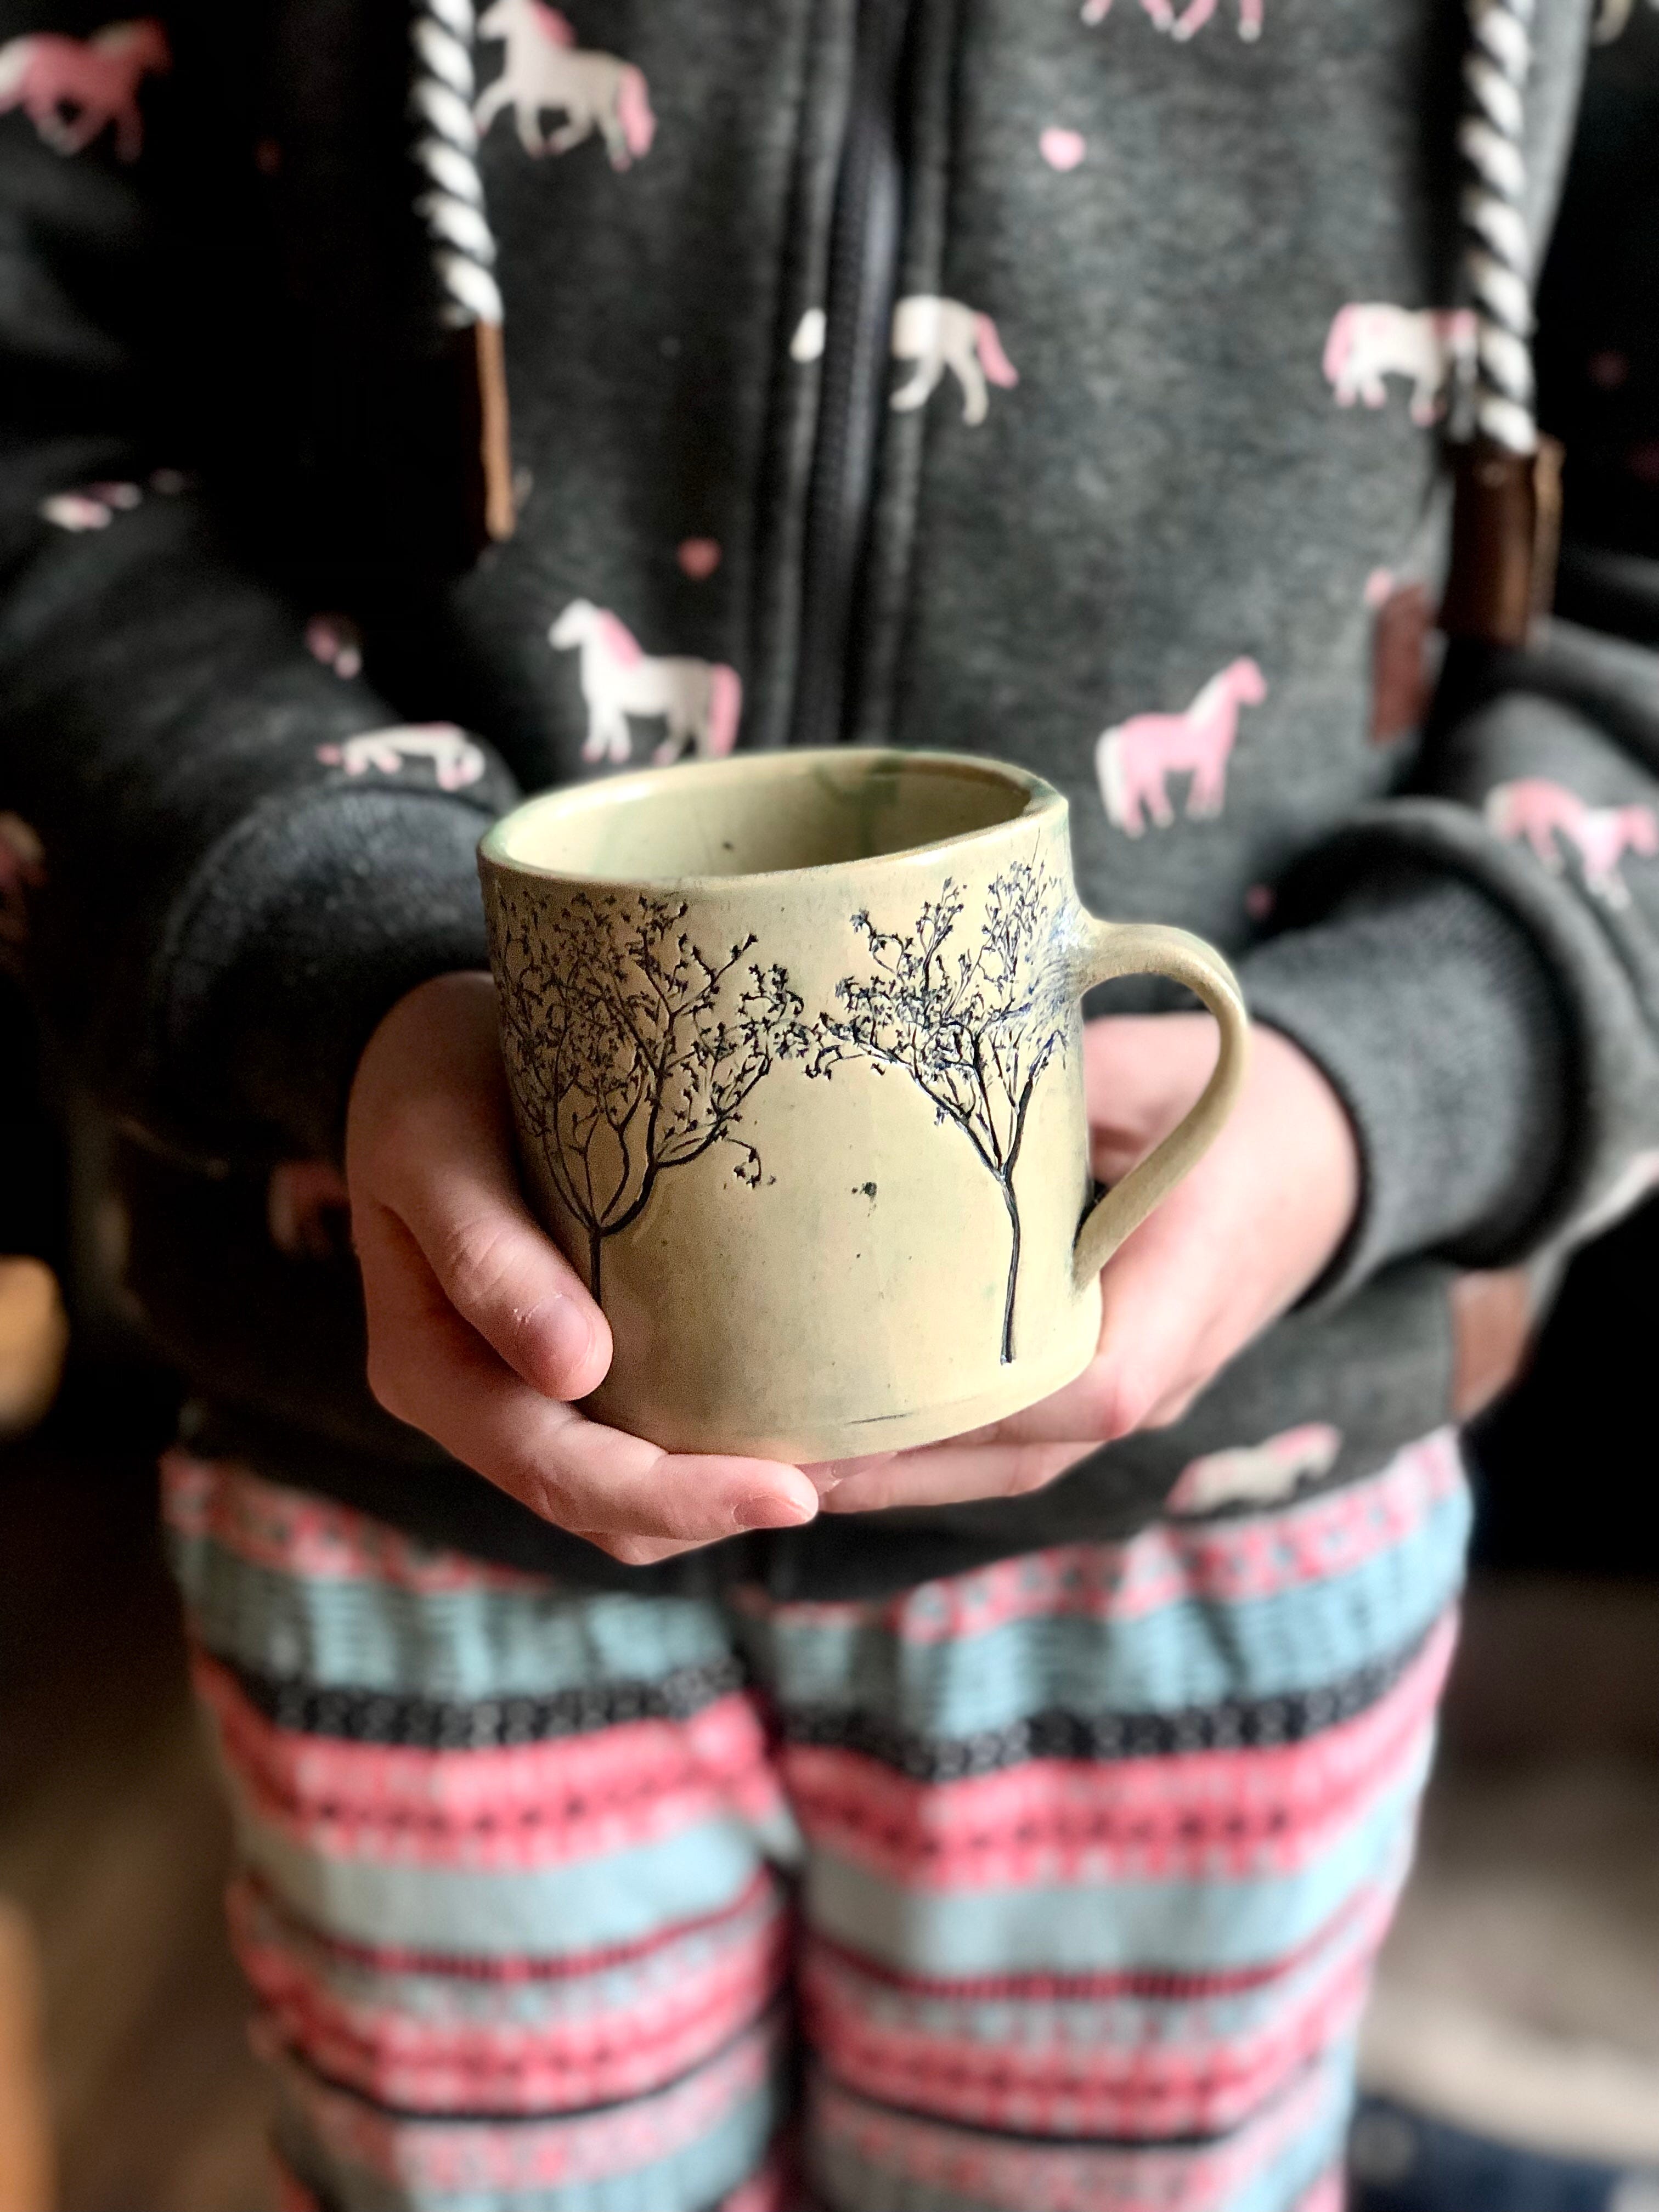
From my hands to yours.
Thank you for reading and I will see you next time.
Sara xx
If you would like to see my work
My Etsy store just got a bit of a facelift and I invite you to take a look at the new mugs and trays. I am also on Instagram, though more and more I wish I weren’t.
And if you know someone who would also enjoy reading Clay on my mind, consider sharing it with them.
Adorei! É um curso mas com as reflexões do professor sobre a própria lição, o que raramente acontece. Afinal, davas uma excelente professora! 😘
I love this. Process writing is such an interesting and meditative genre, with so much room for insight and introspection.
I took a ceramics class in college and I loved playing with clay and making things. What I didn’t love was the critique, the grading, the feeling like my things that I loved weren’t good enough. I didn’t love feeling like there were two tiers of students: the art majors and the others. I didn’t love that as an other I was less valued. I didn’t live that I was an outsider and that I wasn’t worth the time. I felt like an intruder instead of a valued guest. I felt like my taste didn’t matter only the teacher’s taste. I felt like my pleasure in the process was less important than the product.
I think I’d like to take a class again where there’s no grade, no pressure, just the pleasure of losing myself in the clay and the process is allowed more important than the product. I’d like to be free to play.
Wow. I didn’t know I had so many strong feelings in there about ceramics! That was kinda cathartic!